Installing Windows Server on a Virtual Server
Introduction
This guide was written using Windows Server 2025
The instructions can be applied to other versions of Windows Server. However, there may be minor differences.
Preparations
Add Windows ISO to Library
First you need to gather a Windows (Server) ISO which you use for the installation.
Then create a direct download URL for this file, e.g. a webserver, S3 bucket (public/presigned url) or a file hosting like nextcloud. The URL must download the ISO directly, without any interaction, frontend or similar.
With this URL, add the windows ISO as a custom ISO to your organization at Hosting > Custom ISOs and wait until the ISO is in Status Ready. Depending on the size of the ISO, this may take a few minutes - we will send you an email when the ISO is ready to use.
Insert ISOs into VPS
The first step is to shut down the server. Switch to the tab "Reinstall" and proceed as follows:
- Insert ISO: virtio-win.iso
- Attach custom ISO: your chosen Windows ISO
The first ISO are the VirtIO drivers for network, disks and other devices. The second ISO is the Windows installation media you downloaded.
Attaching the Windows ISO may take a few minutes depending on the size of the ISO.
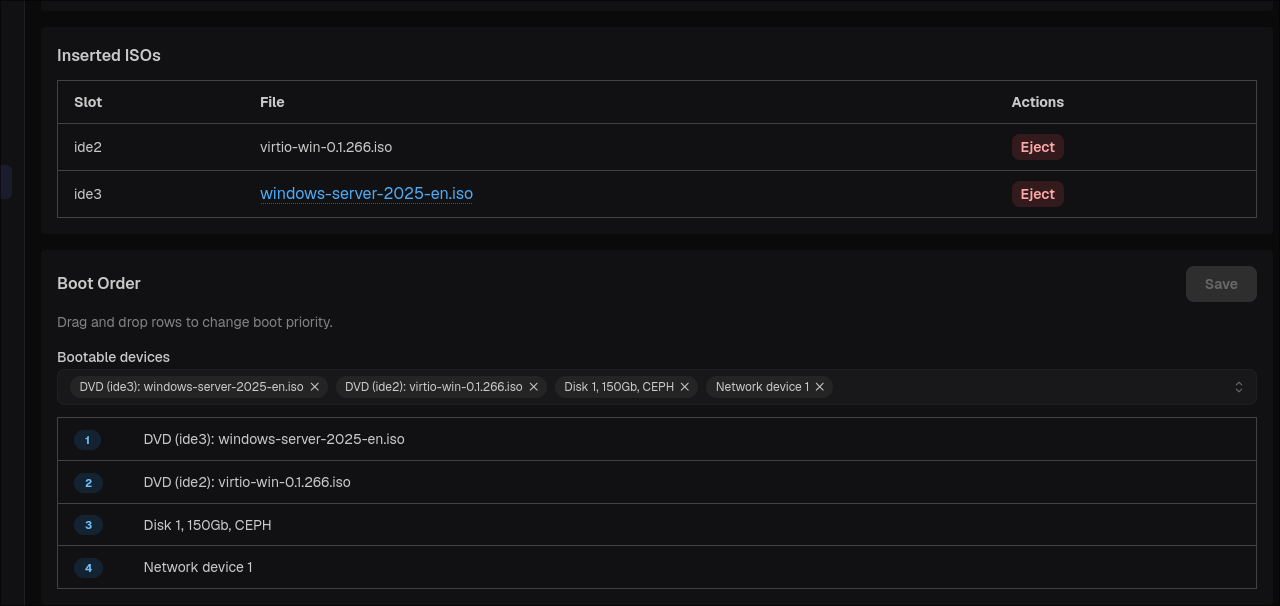
Adjusting the Boot Order
After the ISOs are attached, you need to adjust the boot order of the server.
You can do that at the bottom of the "Reinstall" tab. Drag-and-drop the Windows DVD Drive to the top of the list and click the "Save" button.
Installation Process
Now your VPS reboots into the Windows installation media and you can start the installation process by opening the VNC console in the "Overview" tab.
Most windows versions require you to press a key to boot from the DVD drive. So we recommend opening a VNC Console, executing a reset in the CCP and then press any key repeatedly until the Windows installation starts.
You now can click yourself throught the regular Windows Installer until you are asked to select a disk.
For this, you need to load the drivers.
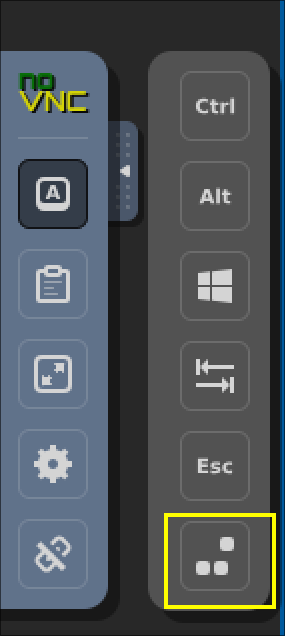
Click "Load Driver", then "Browse" and select the folder amd64\ Then you can select the driver and install it. After this, delete all Partitions on the disk (select them and click "Delete Partition"). You should then have a single "Disk 0 Unallocated Space" left. Select this and click "Next" to continue the installation. Windows will now reboot multiple times, you are asked for a password for the Administrator user in this process. Now you can log into Windows. For Windows Server you need to press CTRL+ALT+DEL to log in. Dont do this on your keyboard but rather use open the VNC options with the arrow at the left center of the console, then click the first symbol (A Key) and then the last one (3 Squares). Now, open the Windows Explorer and navigate to the virtio dvd drive. Execute the We hand out the primary IPv4-Adress via DHCP, so you should have internet access immediately. If you wanna use a different IPv4 or use ipv6, you need to configure a static IP in the Windows Network Settings. In order to have Remote Desktop access to your Windows Server, you need to enable it in the Windows Settings. You can find this under "System > Remote Desktop". Also, if you want to connect from the internet, you need to add a Firewall Rule in Windows Firewall to allow incoming connections on port 3389 (TCP). You can do this under "Windows Defender Firewall > Advanced Settings > Inbound Rules > New Rule". Select "Port", then "TCP" and enter "3389" as the port. Then select "Allow the connection" and apply the rule to all profiles. Finally, give the rule a name and click finish.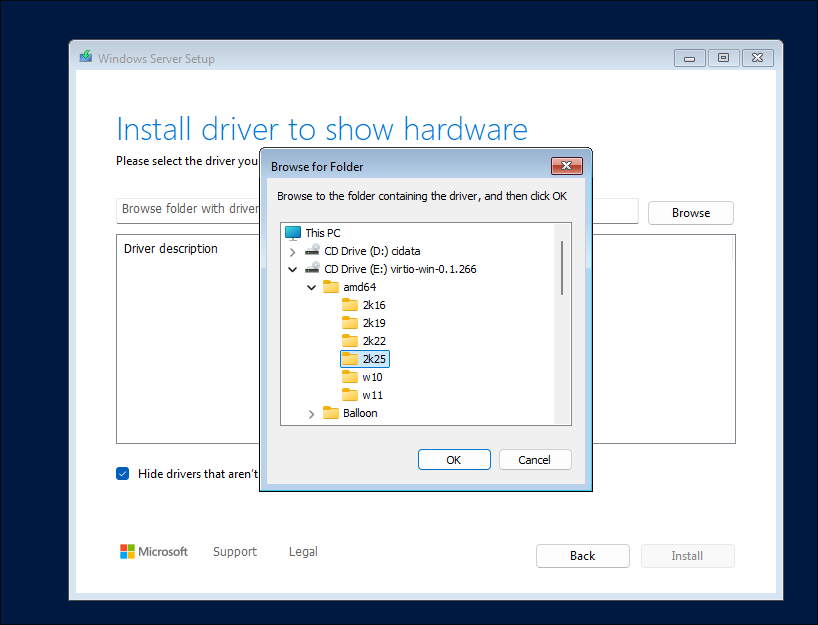
Post Installation
Drivers and Network
virtio-win-guest.tools.exe file to install all needed drivers, you can use the default options if asked.Remote Desktop Access